Astro-photography
Astro-
photography
"During his planet search, Tombaugh photographed 65
percent of the sky and spent 7,000 hours examining about 90 million star images....
Few astronomers have seen so much of the universe in such minute detail."
Historical Marker Extract
Burdett, Kansas
near Tombaugh boyhood home
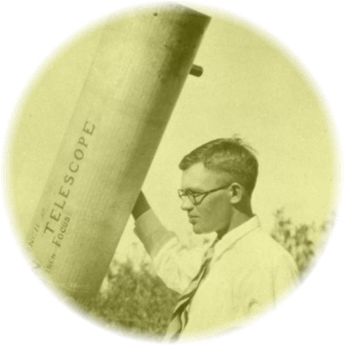
Clyde Tombaugh
Discoverer of Pluto and many other objects
Media Credit:
Roger Harris, CC BY 3.0
via Wikimedia Commons
"During his planet search, Tombaugh photographed 65
percent of the sky and spent 7,000 hours examining about 90 million star images....
Few astronomers have seen so much of the universe in such minute detail."
Historical Marker Extract
Burdett, Kansas
near Tombaugh boyhood home

Clyde Tombaugh
Discoverer of Pluto and many other objects
Media Credit:
Roger Harris, CC BY 3.0
via Wikimedia Commons
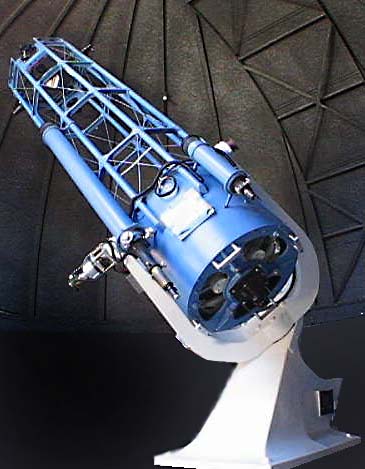
Stony Ridge's 30-inch Carroll Reflector - Telescope or Telephoto??
Photons, Futility, and Funnels
Most telescopic discoveries would be impossible without photography. Most.
Notwithstanding the ability to sketch what’s seen at the eyepiece, which can be highly useful for observations of the Moon, Planets, and comets – solar system objects in particular, the human eye is simply incapable of accumulating electromagnetic information, “imagery,” beyond the moment. Thus, it is a poor recorder of faint light. Even very large telescopes cannot instantaneously deliver enough of it in this application to produce much useful science.
More like lenses for the cameras themselves, institutional telescopes are rarely “looked through.” Instead, like giant funnels, they collect precious photons coming to the end of their impossibly long journey. Lest these tiny packets “die” by hitting the ground, the floor of the observatory, or harmlessly striking the observer, the telescope’s optics channel them to media like film or electronic detectors. If enough are gathered, the resulting image can tell the story of their journey and from where they originated. Of course, this provides a permanent record for later study or historical documentation.

A Bucket for Gathering Photons
Conventional Film Photography
Recording by Emulsion
Traditional, film-based photography relies on an ingenious process of physical chemistry. In the simple case of black and white imaging, the staple of work produced by SRO for most of the last century, a “sandwich” of media constitutes the film.
The top layer consists of a gelatin suspension featuring minute crystalline grains of light-sensitive silver halide of various sizes. It is here that the magic begins to take place. (“Halides” as mentioned here are light-sensitive compounds consisting of one Silver atom and another from one of the six so-called “Halogens,” Flourine, being one.)


Film Emulsion Makeup
Photons, focused by the telescope’s optics, strike the grains, triggering a reaction. The photon is absorbed to liberate an electron, this leading to a decomposition into halogen and a “speck” of atomic silver upon the crystal.
At the bottom of the sandwich is a protective, anti-scratch layer that guards the transparent plastic material which serves as the structural backbone of the media.
Between the plastic and the gelatin layer is a substrate that traps photons that didn’t strike any grains, a feature which preserves the integrity of the image. (“Free” photons could otherwise reflect off the plastic layer and back into the gelatin where the light, now unfocused and scattered, could randomly activate the silver halide, degrading the image.)
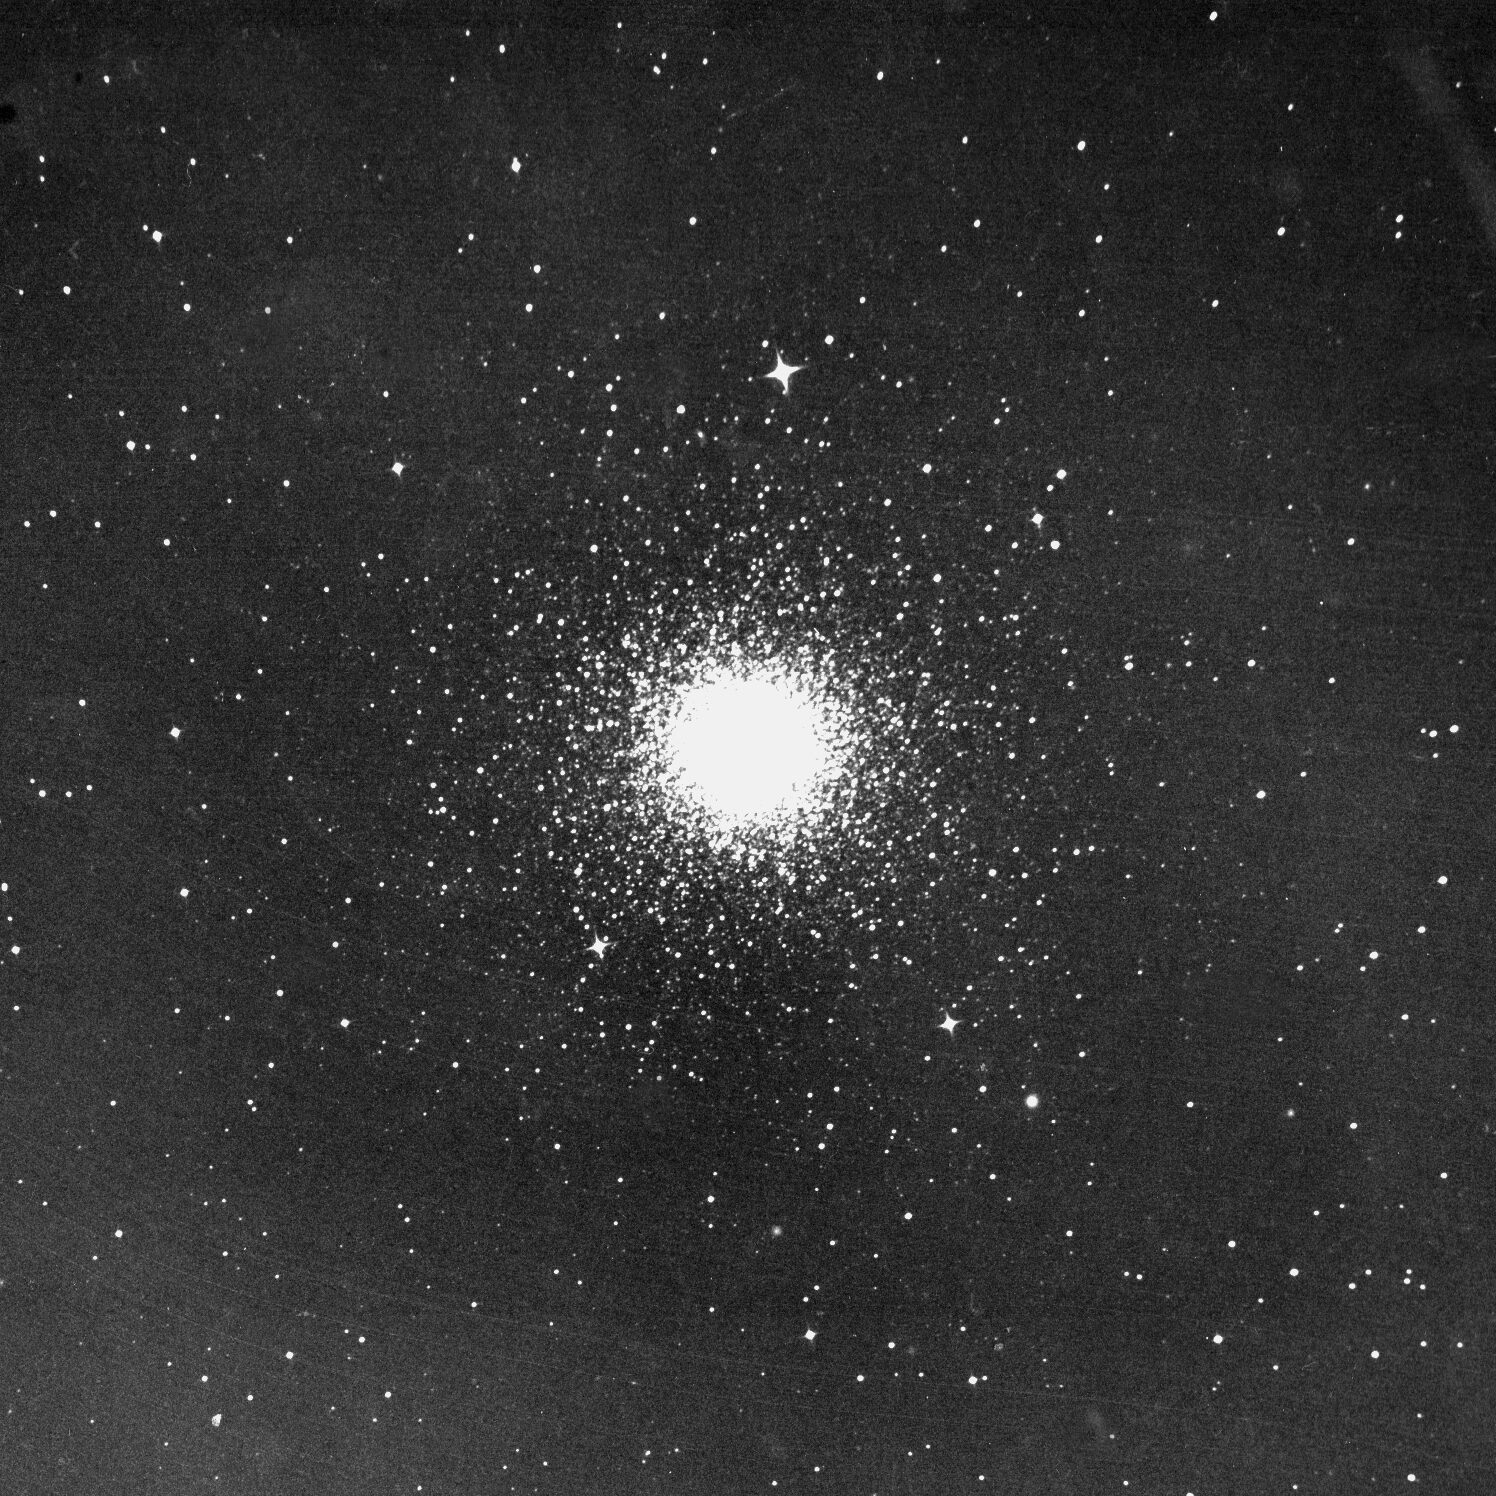
Capturing a Cluster
This fine image of M3 (NGC 5272), a bright globular cluster in Canes Venatici, was made on March 19, 1964 not long after SRO became fully operational. The exposure, taken through the Carroll reflector, ably demonstrates the utility of film based media, not to mention the superb optics of the telescope.
To say that this recording technology was typical of that era is a bit misleading - there was simply no alternative, except to say that different emulsions were available to better serve specialized applications. For example, Kodak's "103" series of spectroscopic media was especially helpful for astronomical use. Depending on the object being photographed and knowing the color properties exhibited by it, the astronomer could choose an appropriate emulsion uniquely suited.
The 103 formulations were used at SRO, but the film type isn't known in the photo shown here. Kodak produced the product in multiple formats including large, 4x5 inch glass plates. The astronomer had to be careful when loading the plateholder, a job that had to be performed in total darkness. To ensure that the emulsion was forward facing, one technique was to put a corner of the glass up to your lips which could then easily detect the difference between the coating on one side and the other which was barren!
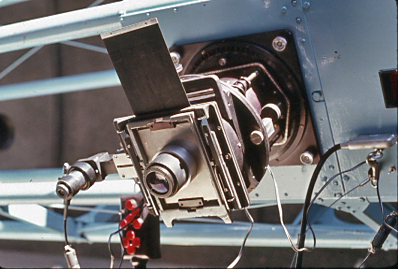
Mike O’Neal,
SRO's Large Format "Camera"
- a large eyepiece for centering the target and focusing before the plate is loaded
- the manually activated “shutter” shown here as it would be lifted to expose the plate
- a smaller eyepiece (L) for finding a star around the field’s periphery and using it to guide upon (“off-axis”) versus guiding through an auxilliary telescope

SRO's Large Format "Camera"
Mike O’Neal,
- a large eyepiece for centering the target and focusing before the plate is loaded
- the manually activated “shutter” shown here as it would be lifted to expose the plate
- a smaller eyepiece (L) for finding a star around the field’s periphery and using it to guide upon (“off-axis”) versus guiding through an auxilliary telescope
Producing a Print
Processing starts with a multi-stage, liquid bathing and rinsing procedure. The first few steps must be performed closeted in total darkness, hence the term “dark room.”
Once the media is removed from the camera, it is sumerged into a solution called “the developer.” Developing takes a speck comprising a small but sufficient number of pure silver atoms and transforms the entire crystal into silver. This stage ends when the emulsion is moved into a “stop bath.”
Following that, the film or plate goes into a “fixing” agent which washes away the unexposed silver halide grains. After fixing, “safe” light can be introduced.
(The color of the permitted illumination is typically portrayed as “red.” Ideally, it is of a precise wavelength and wattage as prescribed by the emulsion’s manufacturer, and its use is limited. In short, this light must not affect any light-sensitive material used in its presence.)
What remains is a “negative” in which dark areas were exposed to light and vice versa. The media is then washed to remove chemical residue and then allowed to dry.
To render a print, the negative is illuminated by a bulb which projects the image onto light sensitive photo paper. This “flips” dark with light and shows what the eye would see.
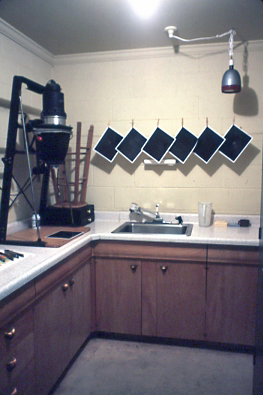

SRO's (not-so!) "Dark" Room
Mike O’Neal,
These were the image processing tools “back in the day,” a typical setup for a large observatory that had to be self-sufficient due to the size of the media, in this case, 4×5-inch plates.
Water was a necessity for mixing chemicals and rinsing.
The machine at left (an “Enlarger”) took the processed plate – now a “negative” – and shined light through it, focusing the resultant image onto photo paper placed beneath it.
From there, the paper was subjected to additional bathing and drying (by hanging) to render the final print.
A lamp suspended from the ceiling provided “safe” illumination subject to the restrictions mentioned above.
Improving Film's Sensitivity to Light
Photography in low light conditions provided challenges to product producers. One mitigation effort was to increase the size of the silver halide grains which resulted in the recording of more light but at a cost of fuzzier, less-well-resolved imagery.
Over time, other innovative solutions were proposed to increase the native sensitivity of the media. One involved using dry ice to chill the film to super-cold temperatures just prior to use. Another technique “baked” the film in a so-called “forming” gas, a combination of hydrogen and nitrogen, this applied at elevated temperatures which removed moisture and impurities.
Both approaches sought to reduce “reciprocity failure,” the characteristic of exposed film in which the amount of recorded light does not accumulate linearly with time.
These methods became commercially available beginning the early 1970s and persisted until the age of electronic image capture arrived in earnest during the 90s. It isn’t clear that either sensitizing method was used at SRO.
"Lucky" Imaging from SRO
In support of Stony Ridge Observatory’s Lunar Mapping Program in the 1960s, movies were made, this in an attempt to best exploit the temporary moments of atmospheric steadiness that occur at random.
By carefully examining the resultant motion picture, it was hoped that some frames would indeed have “frozen” the atmosphere to yield images of sharp detail. Given the relatively low sensitivity of film, even with a bright object like the moon, the results were probably mixed, yet this same technique, advanced and adapted, would be widely used when electronic detectors would come along.
Jaw-dropping amateur results have been produced by applying this method with specialty cameras (CMOS astronomical devices) in conjunction with processing software that rejects “bad” (distorted) frames, stacks the “good” ones to improve the signal to noise ratio, then performs wavelet post-processing of the digital image to coax a surprising amount of detail from it. Some of this work has been produced at SRO.
Electronic Imaging at Stony Ridge
CCD Sensors - a Paradigm Shift
Beginning in the 1990s, electronic imaging technology became broadly available to the scientific community and to small numbers of advanced amateur astronomers who could afford it.
Based initially on expensive Charge Coupled Device (CCD) sensors, the cameras were able to overcome several of the issues common to film photography: reciprocity (non-linear response to exposure time); sensitivity at the cost of graininess; processing delays and costs; these among others.
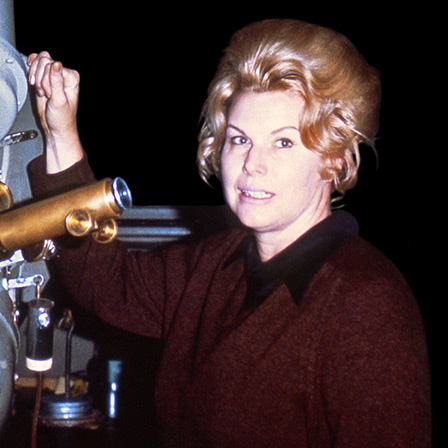

Dr. Eleanor F. "Glo" Helin
NASA/JPL-Caltech,
Public Domain
The first CCD camera used at SRO was a model ST-6, manufactured by Santa Barbara Instruments Group, a leader in bringing the technology to an increasingly broad user base. Later, an advanced camera (made by Apogee) providing greater sensitivity and a wider field of view was arranged for and provided by NASA/JPL astronomer and Stony Ridge benefactor Dr. Eleanor Helin. The accompanying picture shows her at Palomar Observatory’s 18-inch (.46m) Schmidt telescope in 1973.
You can read about how these cameras were employed on the Asteroids page, accounts which detail SRO’s collaborations with her on matters important to every human being.
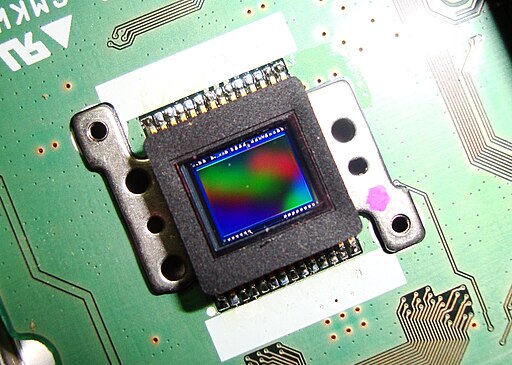
How Does It Work??
Electronic sensors have revolutionized astrophotography.
Great! But do you know how they work??
To see a demonstration which explains it, click the link above (or the photo) to visit SRO's channel on YouTube.

How Does It Work??
Electronic sensors have revolutionized astrophotography.
Great! But do you know how they work??
To see a demonstration which explains it, click the link above (or the photo) to visit SRO's channel on YouTube.
CMOS Technology - Electronic Imaging Comes of Age
In recent years, Compatible Metal-Oxide Semiconductor (CMOS) sensors have proliferated and now dominate the market in terms of availability and economics. The quality of the data they produce, once a distant second to that of their pricier cousins, the CCDs, is now considered to be on par for many applications.
Not only have the sensors become quite efficient at converting photons to electrical charge, but the frame rates at which they can deliver the data make them excellent candidates for high speed, “atmosphere-freezing” capture of lunar and planetary imagery.
Processing Digital Images
Simple (in Theory!)
When you use a digital camera to take an astronomical image, you are recording what is known as a “Light” frame. This image must then be processed by software. The entire workflow seems rather straightforward: light from your telescope has struck the pixels of a sensor, the camera has converted the accumulated photons to numeric values pixel by pixel. Once you have an image that consists of rows and columns of such data, you can easily manipulate it any way you want.
Simple, right?
Actually, “no,” not so much…
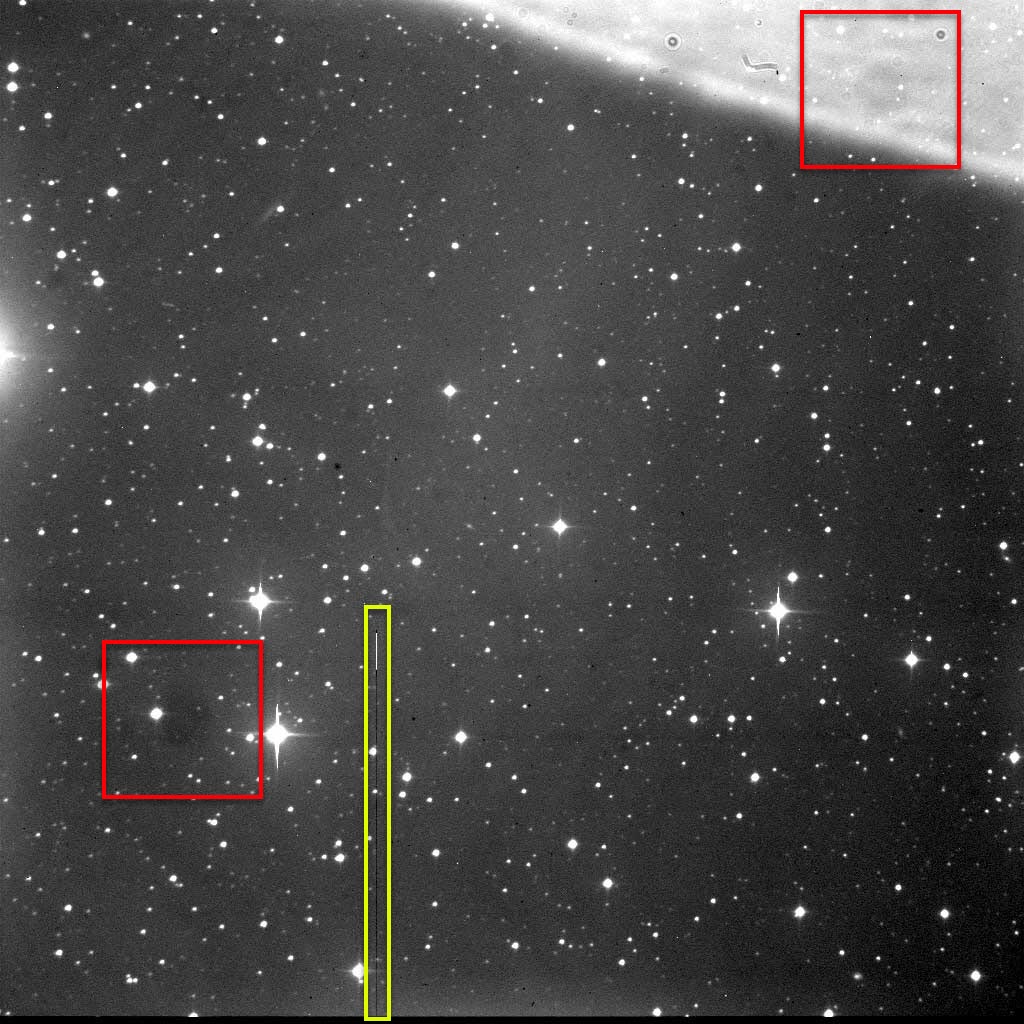

Artifacts
Digital images are the sum total of everything that accumulates in the pixels of the sensor. To create an aesthetically pleasing photo, extra steps must be taken to remove offending artifacts.
Here, the red boxes highlight motes of dust in the optical train. Since the telescope is focused on the stars (and not the dirt!), the dust bits appears as large, circular regions. The White and Black vertical line inside the yellow box is a “column defect” in the sensor.
This image was captured as part of an asteroid research program where beauty takes a back seat to data collection. “As is,” it was perfectly suitable without extensive processing.
The image below suffers from uneven illumination at the edge of the field, which is observed as a circular, rather uniform darkening.
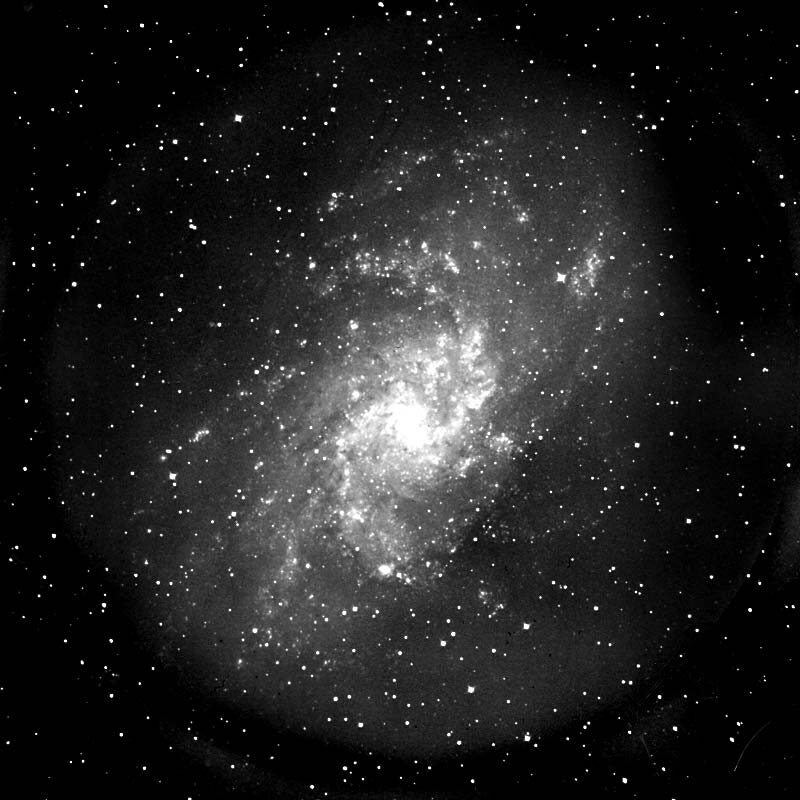

Uneven Illumination
Pssst...Your Deep Sky Astrophotos Are Biased!
CCD or CMOS sensors are electrified devices and their pixels already contain some level of charge even before recording starlight (or galaxy light, or…). That energy, called “bias,” has to be measured by taking a series of the shortest exposures a camera can make – with no light allowed to hit the sensor – then averaging those readings pixel by pixel. (The exposures must otherwise use the same settings as the “Lights.”)
This results in a “master bias” image, a map of pixel values which must be subtracted one-to-one from each Light frame. For example, the pixel value at row x and column y in the bias frame is subtracted from the x,y pixel value in each Light frame.
Good Astrophotos Can't Stand the Heat
The longer the exposure, the more the sensor heats up due to electrical activity. This thermal signal is seen by a pixel as if it were light, indistinguishable from the light of the object or from Bias signal masquerading as light. Like Bias, it must be measured, averaged and subtracted. This is done by making a series of exposures (“Darks”) at the same settings as the “light” pictures, these parameters to include the temperature of the camera/sensor itself. In the same manner as Bias frames, no light is allowed to strike the sensor and a Master frame is produced for similar subtraction.
Some cameras have a cooling feature which lets you control the temperature of the sensor. This allows the creation of Dark frames anytime, but if the camera lacks this ability, it is best to take those “images” immediately after you take the Light frames.
Dust Bunny Blues, Noise, Gradients, ...
Even after removing the effects of Bias and Thermal energy, long exposure astrophotos can require substantial correction of the actual light which hit the sensor. Noisy (grainy) images, those exhibiting a gradient of uneven illumination not due to vignetting, the effects of dust, and many other issues can be fixed by a combination of tools in the image processing software along with the use of “Flat” frames.


Example of a "Flat" Frame
Flats are exposures which use a uniform source of illumination to correct artifacts due to dust and vignetting – the pattern of light drop-off toward the edge of the field of view. When taking that series of exposures, which are averaged together, it is essential that the optical train be in the exact same configuration as when the Lights were taken.
If there is any change to the telescope’s focus, any misalignment of the camera and scope, or even if the dust has moved, the value of the Flats is degraded. Depending upon the amount and severity of the changes, Flats may become so compromised that the chance to correct these kinds of defects will be severely limited or functionally impossible.
About Colors...
Color Cameras: Convenience...at a Cost
In the video mentioned above (How Does it Work??), we can see that all electronic camera sensors are natively monochrome – their pixels register only varying shades of gray with black and white at either extreme. Color is induced by first overlaying the sensor with a repetitive array of red, green, and blue filters (a Bayer Matrix) which effectively make each pixel sensitive to only one of those three colors. While providing the convenience of needing only one exposure to produce a color image, this necessarily reduces resolution.
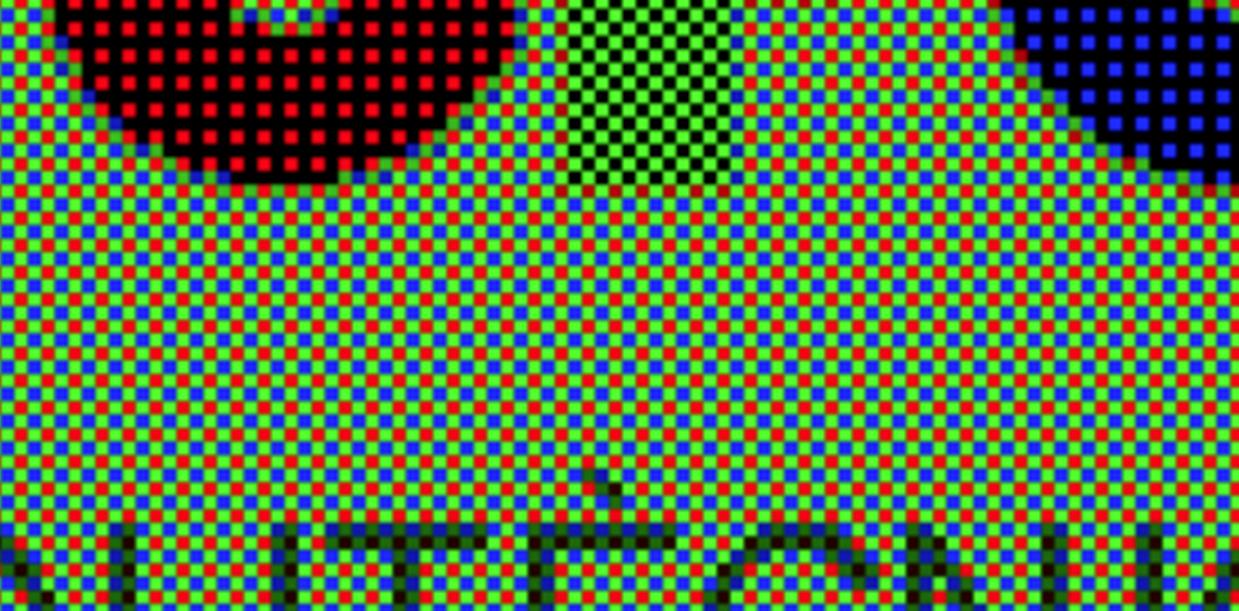
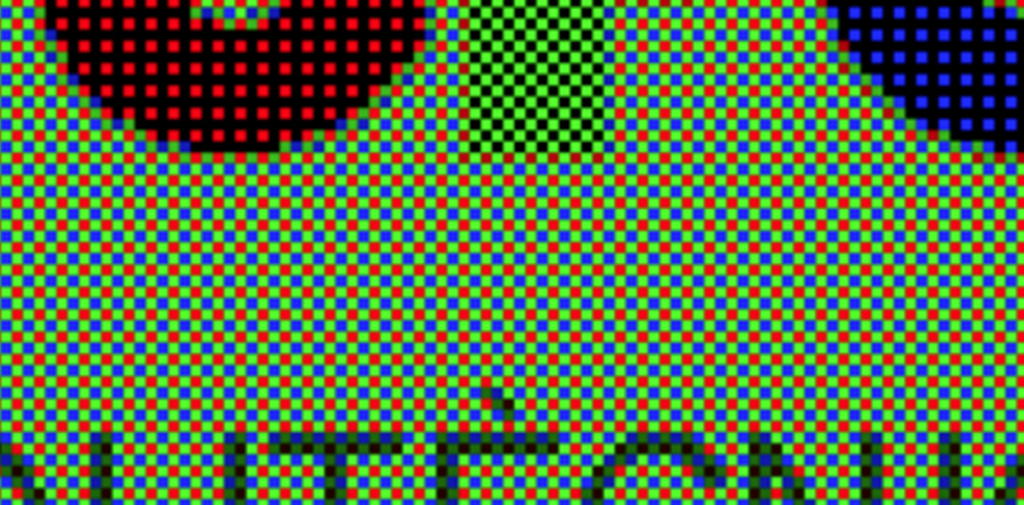
Bayer Matix:
RGRG...
GBGB...
Pattern
SaxSub,
CC BY-SA 3.0,
via Wikimedia Commons
Every photon in the visible spectrum carries a component of red, green, and blue color. However, consider the impact introduced by the Bayer matrix used by color cameras. As can be seen in the highly magnified photo above, each pixel can only register the contribution of one of the three colors. Clearly, this means the resulting image looses contrast and resolution information because each pixel doesn’t get a fair chance to sample the light incident upon it.
(Note the green bias in the matrix which occurs because half the pixels are devoted to that one color. This weighting is because our eyes are most sensitive to green.)
Color from Monochrome - Better for Science
A more time-consuming approach, but one that can yield a better end result is to use a strictly monochrome camera and shoot three separate images through Red, Green, and Blue filters. In this method, each pixel effectively samples each component color.
The three images must then be combined to create the final, full-color picture. To be sure, the workflow (to include, “Bias” and “Dark” frames plus, for all three colors, “Flats”) is at least three times harder than it is for a single-shot color image, but the reward of greater resolution and contrast justifies the effort.
False Color Images (The "Lies" We Sometimes Tell and Why We Tell Them)
Electronic imaging cameras are “broad spectrum,” capable of detecting energy throughout the visible range and slightly beyond, especially where infrared radiation is concerned. And this presents a problem when light pollution is prevalent, as this manmade illumination is captured along with the astronomical object being imaged.
To try and filter out the objectionable energy, special filters can be used with monochrome (and color) cameras to reject wavelengths known to originate here on Earth. Such imagery takes on an unnatural look, but does yield significantly more detail than would be rendered by their broad spectrum counterparts.
Combating bright skies isn’t the only reason to fine-tune a telescope’s response. For example, the James Webb Space Telescope has been designed to be most sensitive to IR radiation, long wavelength energy which can pass through dusty regions of space that would otherwise block light in the visible part of the spectrum. The same can also be said for other specialized telescopes able to detect ultraviolet and x-ray sources, among others. The ability to sense such exotic radiation allows us to see the universe in a more comprehensive way, revealing details that would otherwise be missed.
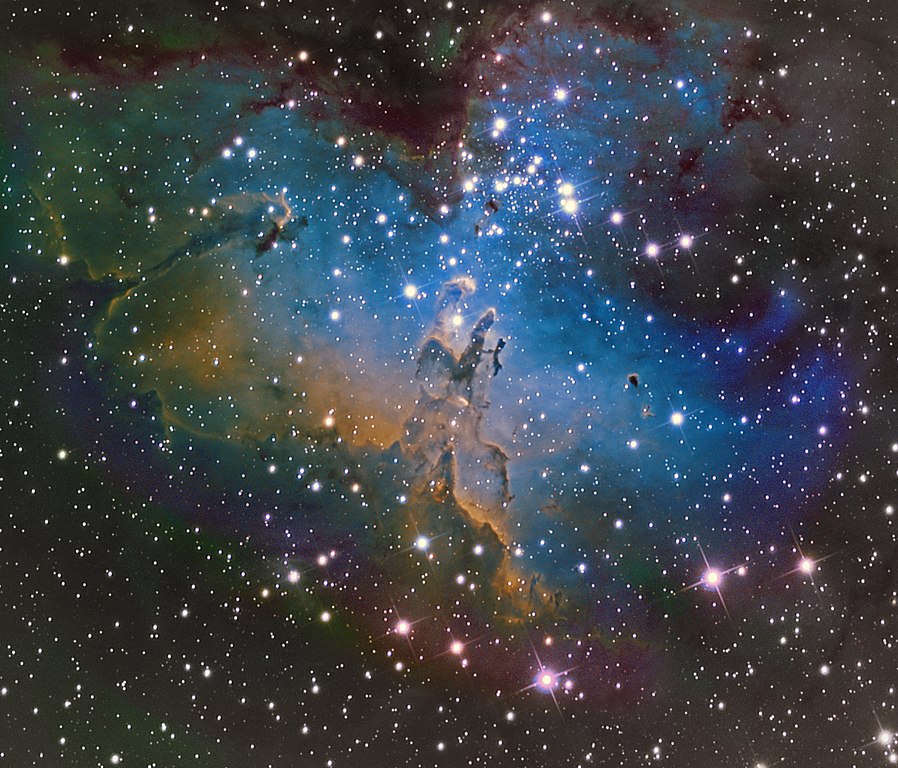
The "Eagle" Nebula Region, and M16 (NGC 6611) in False Color
To combat light pollution, astro-imagers can use specialized filters to block areas of the visible spectrum where artificial (i.e., man made) light is prevalent. The most common approach is to use a monochrome camera with a set of three filters, each one optimized to isolate a particularly narrow range of wavelengths with significance for astronomical objects like the nebula pictured above.
The three monochrome exposures are "mapped" as if they were taken through normal Red, Green, and Blue filters and then recombined. Various filter combinations called "palettes" have been devised. The one used for this photo is the so-called "Hubble" variant which employs SII (doubly-ionized Sulphur), Hα (Hydrogen alpha), and OIII (triply-ionized oxygen). These were treated as the Red, Green, and Blue components in the RGB image created from them.
The aesthetic of such "false-color" imaging may take some getting used to, but the advantages provided by the strategy are a welcome ally in the fight against an ever brightening night sky.
W4sm astro, CC BY-SA 4.0,
via Wikimedia Commons
The State of "Filtered" Imaging from Stony Ridge Observatory
As of early 2024, digital photography from Stony Ridge has consisted of conventional, broad spectrum equipment in both color and monchrome. While skies at the observatory have remained reasonably dark, especially for a facility so close to the LA Basin, it must be acknowledged that they are nowhere near as favorable as they were in the late 50s / early 60s. The steadily growing imposition of light pollution has prompted a response from SRO astronomers who have begun to employ blocking filters to reject light from Earthly sources. (An example of recent work is found on the Diffuse Nebulae page.)
Filtered imaging obviously reduces the amount of light reaching the sensor and narrowband appliances are the most restrictive examples. The longer exposure times that result are somewhat offset by the Carroll Telescope’s large mirror and it’s ability to collect more of the diminished light stream. Since amateur astronomers using much smaller telescopes have produced incredibly encouraging results, there was every reason to believe that similar outcomes would be possible at SRO. That has now been demonstrated with resounding success.


